Guide to Achieving Smooth Top Surfaces in 3D Prints
Achieving a smooth, premium top surface finish is critical when printing flat models like desk nameplates, signs, and keychains. Since these parts are viewed closely, any small ridges, under-extruded gaps, or rough textures are instantly noticeable. FDM printers naturally leave tiny extrusion lines as they lay down plastic, but with the right settings in Bambu Studio, you can achieve a flawless, professional finish that rivals injection molding.
1. Top Layer Ironing
Ironing is a slicer technique where the hot nozzle runs slowly over the topmost layer of your print after it is completed. The nozzle extrudes a very small flow of plastic (around 10%) to fill in tiny gaps, using the heat of the nozzle itself to smooth out any ridges or lines left during normal printing. This results in a completely smooth, matte finish.
- Ironing Type: Set this to "Topmost surfaces" to ensure only the final visible layer is ironed, saving printing time.
- Ironing Flow: Start with 10% flow. If the surface is rough, increase to 12-15%. If there is overflow or excess plastic at the edges, lower it to 8%.
- Ironing Speed: Keep it slow—between 30 mm/s and 50 mm/s. Slower speeds allow the nozzle to melt down any high spots smoothly.

Figure 1: The Ironing settings panel under the Quality tab in Bambu Studio. The "Enable Ironing" checkbox and parameters are highlighted in red.
2. Monotonic Infill Pattern
Standard top surface infill patterns often print lines in alternating directions. Because of how light reflects off the plastic, this makes different sections of the top surface look like they have different colors or textures, even though they are printed from the same spool. The Monotonic pattern solves this by forcing all parallel lines of the top surface to be printed in one continuous direction, creating a uniform visual look.
- Top Surface Pattern: Set this to "Monotonic" or "Monotonic Line" under the Strength/Quality settings.
- Top Shell Layers: Ensure you have at least 4 to 5 top layers. This prevents "pillowing" (holes or voids on the top layer caused by heat escaping from the infill beneath).
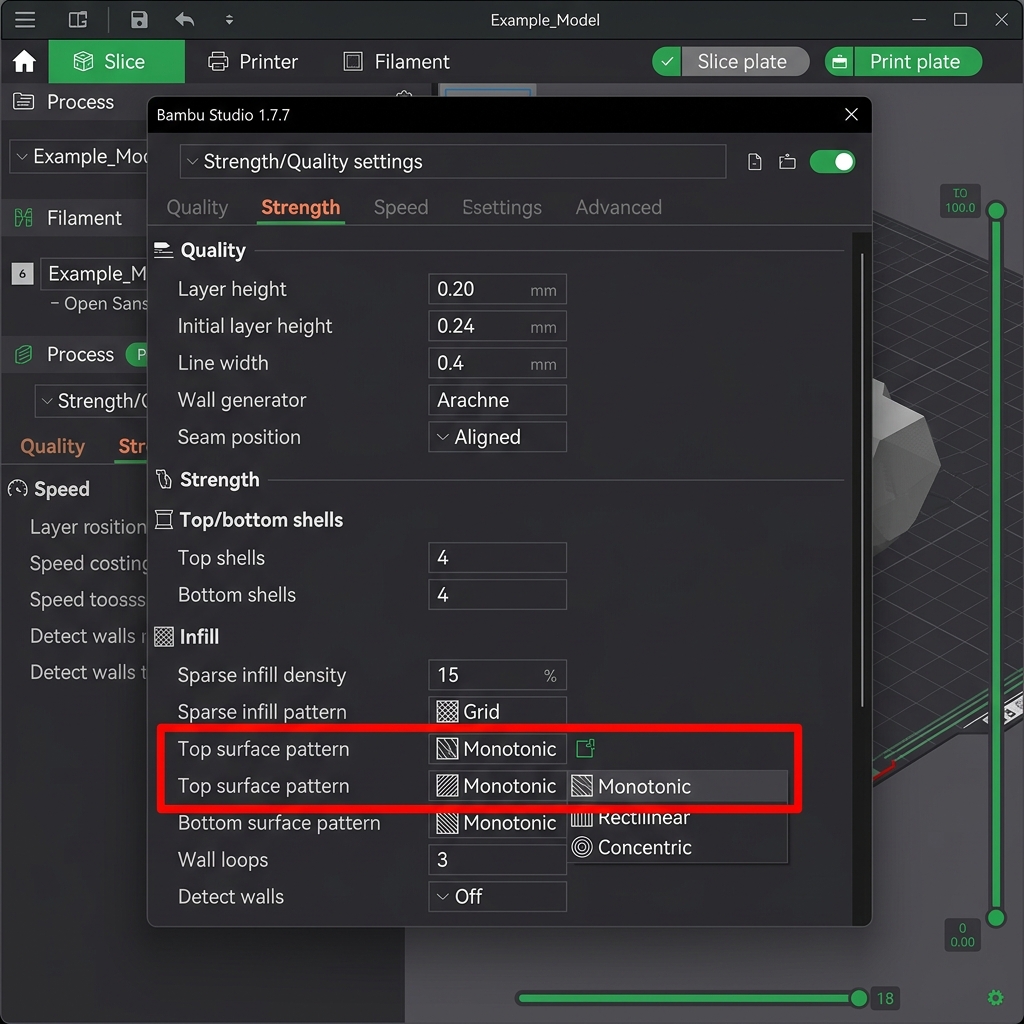
Figure 2: Monotonic Top surface pattern setting in Bambu Studio under the Strength/Quality settings, highlighted in red.
3. Flow Ratio Calibration
If your printer is over-extruding or under-extruding, even the best infill patterns will fail. Over-extrusion causes plastic to squeeze up between nozzle paths, creating sharp, rough ridges. Under-extrusion leaves noticeable dark gaps between the lines. Adjusting the Flow Ratio in your filament settings dials in the exact amount of plastic extruded.
- Tuning: Print a simple flat square. If you feel sharp ridges when rubbing a finger across it, reduce the flow ratio by 0.02 (e.g. from 0.98 to 0.96). If you see gaps between the wall lines and the top fill, increase the flow ratio by 0.02.

Figure 3: The Flow Ratio parameter inside the Filament setting profile window in Bambu Studio, highlighted in red.
4. Hardware Best Practices
Slicer settings alone cannot solve hardware issues. Keep your printer optimized with these tips:
- Replace Worn Nozzles: Over time, abrasive filaments wear down brass nozzle tips, distorting the circular hole into an oval shape. This causes uneven line widths and rough top surfaces. Use hardened steel nozzles for durability.
- Calibrate Z-Offset: Make sure your Z-offset is tuned so that the initial layer is perfectly flat. If the first layer is uneven, the defects can propagate through the print and distort the final top layers.